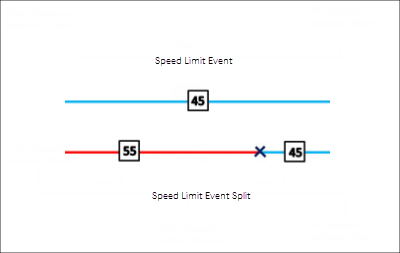
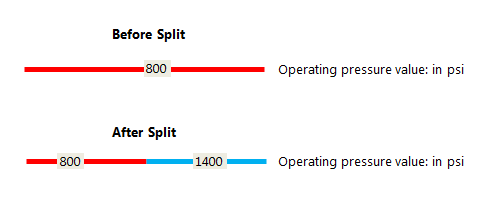
The Split Events tool is used to split a line event into two adjoining events. You are allowed to edit the attributes of the split events prior to selecting the location to split. On successful execution, the resulting split events get new event IDs, and the input event retires.

メモ:
If a line event that uses referent offsets as its start and end measure values is split into two adjoining events, then the resulting split events get new event IDs, and the original event retires. The first event will retain the referent offset values as its start measure value, but will use route and measure as its new end measure value. The second event will use route and measure as its start measure value and will use referent offset values as its end measure value.

- Open Event Editor and, if prompted, sign in to Portal for ArcGIS or ArcGIS Online.
- Click the Edit tab.
- In the Edit Events group, click the Split Events button
 .
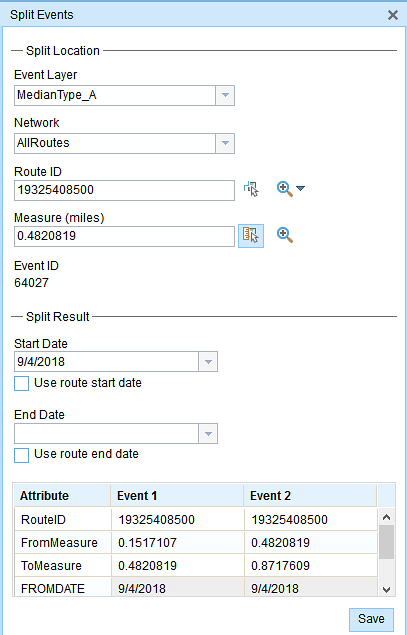
.The Split Events widget appears.
- In the Split Location section, choose an event layer on which to work by clicking the Event Layer drop-down arrow.

- The LRM to which the event is registered is selected automatically in the Network option, but you can choose the LRM by clicking the drop-down arrow.
- Type a route ID in the Route ID text box on which the new event measure will be based.
ヒント:
You can also click the Select a Route on the Map button
 to select the route on the map.
 - Click the Select From Measure on the Map button
 to select a point on an event on the selected route.
 The event will be split into two events on either side of the point. Alternatively, you can enter a measure value in the text box. The event underlying the measure value of the route will be split into two.
The records/attributes of the split event appear in the Split Result area.
- Click the Start Date and End Date calendar controls to choose the start and end dates of the event.
The start date defaults to today's date, but you can select a different date using the date picker. The end date is optional.
- You can edit the fields in white.
The gray fields are disabled and not editable.
メモ:
Coded value, range domains, and subtypes are supported when configured for any field in the Attribute-Value table.
- Click Save to split the records.
A confirmation message appears at the lower right once the edited event is saved.